![]()
![]()
The database admin tool supports the configuration and saves the column settings. By default, a set of fields in the study, series, and image level are displayed. Users can change the set of displayed fields, the order in which they are displayed, and the width of each column.
The user interface to perform these changes is similar to that used in the CARESTREAM PACS Client. All changes are available at the Study, Series, and Image level.
|
To: |
Do this: |
|
Move a column |
Left-click the column header and drag the column to the right or left. |
|
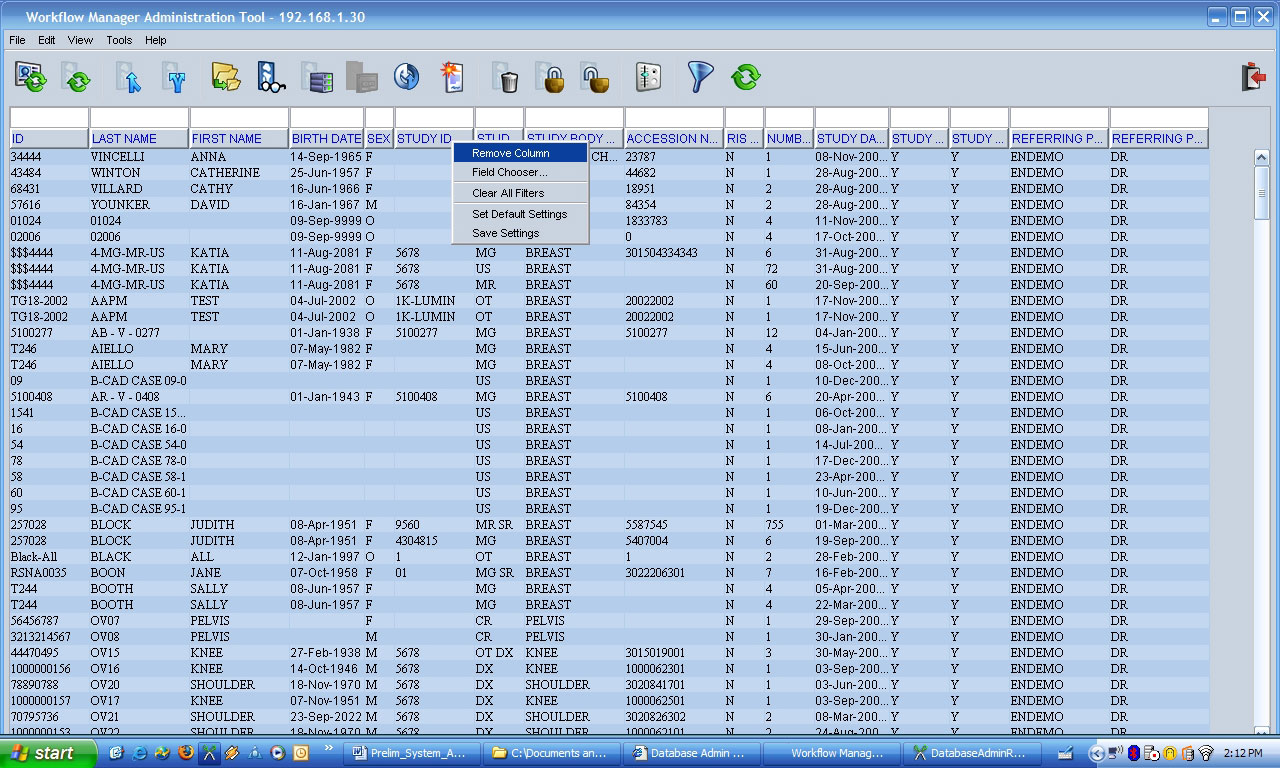
Delete a column |
Right-click the column you want to delete and select Remove Column. |
|
Change the column width |
Left-click the edge between two adjacent column headings and drag to the position you want. |
|
Add a column |
Right-click anywhere on the column header, select Field Chooser, and click Add. |
|
Remove a column |
Select a field in the right pane, select Field Chooser, and click Remove. |
|
Save changes |
Right-click anywhere in the column header and select Save Settings. NOTE: If you do not save the settings, changes apply only to the current session and are not saved for new sessions. |
|
Reset the filters |
Right-click any column in the right pane and select Clear All Filters. |
|
Reset the default settings |
Right-click anywhere in the column header and select Set Default Settings. |
To change the fields appearing in the Database Admin Tool:
1. Right-click anywhere on the column header and select Field Chooser.
The Field Chooser window appears. The left pane lists all available fields in alphabetical order.
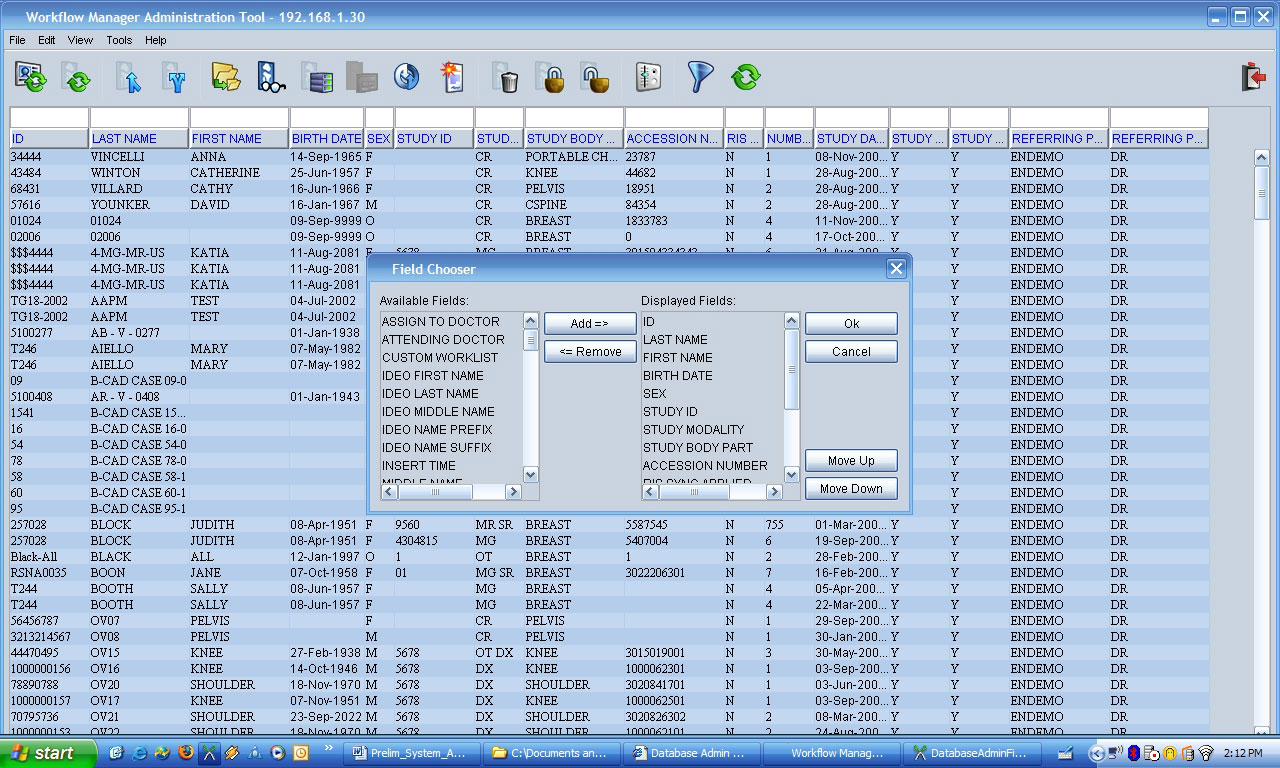
2. Click the desired field.
3. Click Add.
The chosen field is added to the list on the right pane, which lists the fields to be displayed.
4. To remove a displayed field, highlight a field in the right pane.
5. Click Remove.
6. Use the Move Up and Move Down buttons to change the order in which the displayed fields appear.
7. Click OK when complete.